

![Crochet Basketweave Stitch [Free Video Tutorial & Written Pattern!]](https://images.squarespace-cdn.com/content/v1/5e18a0efb9904526f1bedb80/1679415954970-0L9H1X0BGSHWTQWRRVOO/blog_basketweave_stitch.jpg)
Crochet Basketweave Stitch [Free Video Tutorial & Written Pattern!]
Learn how to Crochet the Basketweave Stitch - a gorgeous dense textured stitch! The Basket Weave Stitch looks intimidating but is easy to master once you get going!
Watch the full step by step video tutorial below or alternatively, keep scrolling for the written pattern :)
Pin for later
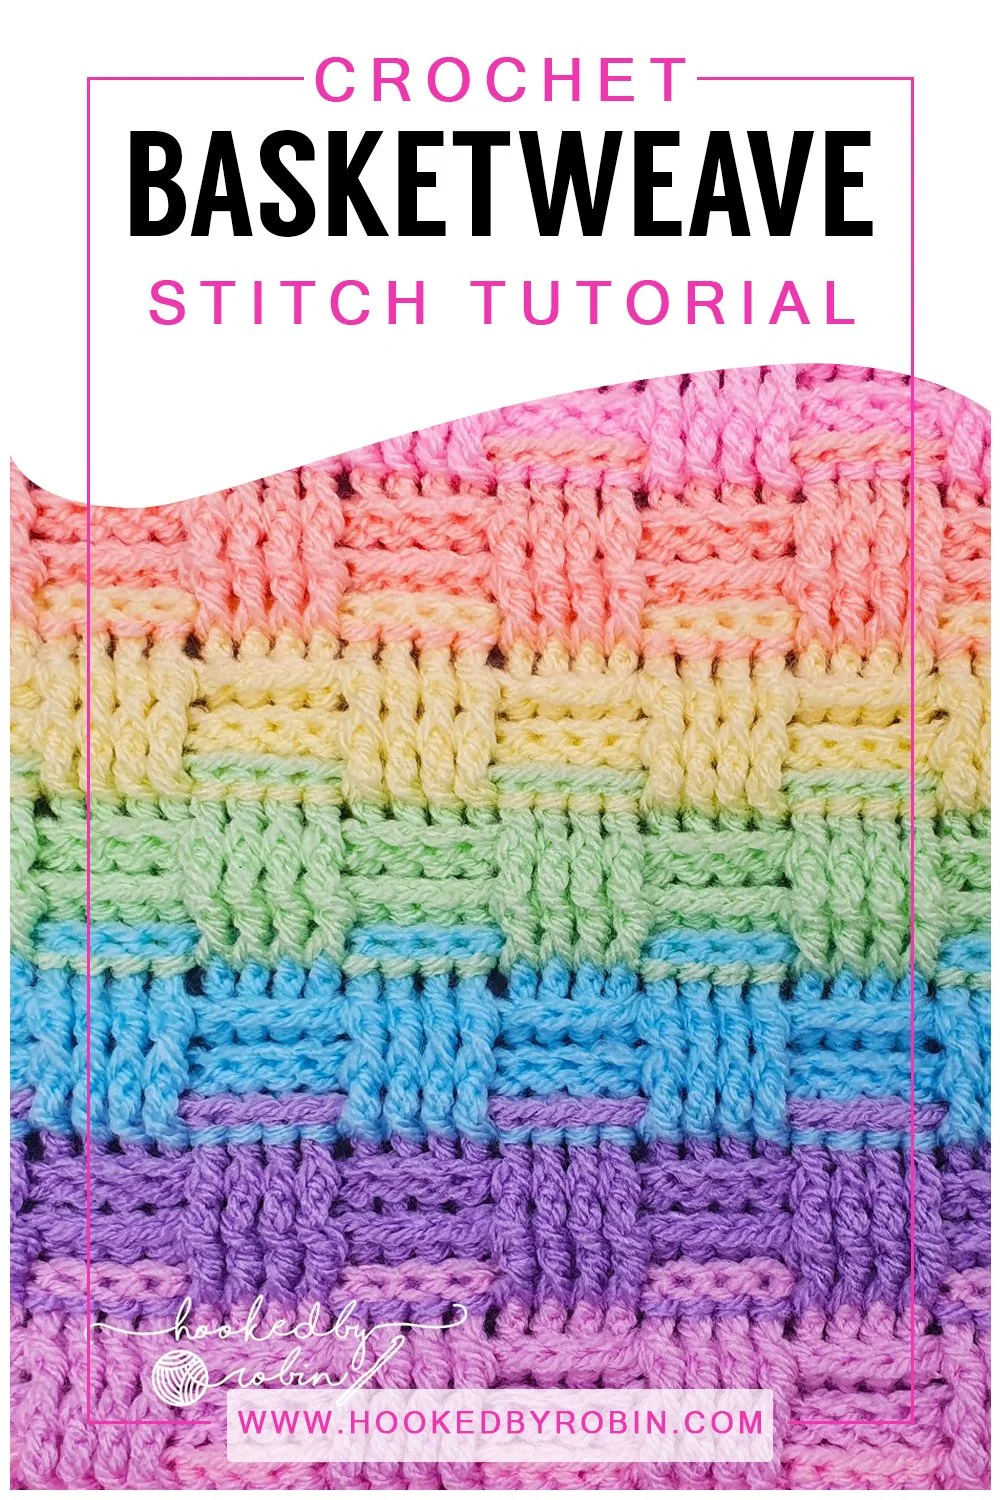
Crochet Basketweave Stitch WRITTEN PATTERN
USA STITCH TERMS
You can use any yarn and hook you would like.
Hook Size(s): according to your yarn
I used Stylecraft Special DK with a 4mm hook in the following colours: Wisteria, Clematis, Candy Floss, Apricot, Lemon, Spring Green & Sherbet
Abbreviations:
• Ch = Chain
• DC= Double Crochet
• FPDC= Front Post Double Crochet
• BPDC= Back Post Double Crochet
• St = Stitch
This stitch has a six-row repeat and to start you want to chain in Multiples of 8 plus 4.
Foundation: Chain your desired amount (be sure it is a multiple of 8 plus 4.) I chained 36
Row 1: DC in 4th Ch from your hook.
DC in each Ch across.
Row 2: Ch 2, turn.
*FPDC around the next 4 sts.
BPDC around the next 4 sts. *
Repeat * across.
DC into the top of your turning Ch.
For the next row you want to put FPDC with the FPDC from the last row, and BPDC with the BPDC from the last row.
Row 3: Ch 2, turn.
*FPDC around the next 4 sts.
BPDC around the next 4 sts. *
Repeat * across.
DC into the top of your turning Ch.
If you are using multiple colours, change colours here.
For the next row you want to put FPDC with the BPDC from the last row, and BPDC with the FPDC from the last row.
Row 4: Ch 2, turn.
*BPDC around the next 4 sts.
FPDC around the next 4 sts. *
Repeat * across.
DC into the top of your turning Ch.
For the next row you want to put FPDC with the FPDC from the last row, and BPDC with the BPDC from the last row.
Row 5: Ch 2, turn.
*BPDC around the next 4 sts.
FPDC around the next 4 sts. *
Repeat * across.
DC into the top of your turning Ch.
For the next row you want to put FPDC with the FPDC from the last row, and BPDC with the BPDC from the last row.
Row 6: Ch 2, turn
*BPDC around the next 4 sts.
FPDC around the next 4 sts. *
Repeat * across.
DC into the top of your turning Ch.
If you are using multiple colours, change colours here.
For the next row you want to put FPDC with the BPDC from the last row, and BPDC with the FPDC from the last row.
Row 7: Ch 2, turn.
*FPDC around the next 4 sts.
BPDC around the next 4 sts. *
Repeat * across.
DC into the top of your turning Ch.
Repeat Rows 2-7 until you reach your desired length.
Tie off, and weave in any loose ends.

If you spot any errors in the written pattern please do let me know.
Happy Crocheting!
Robin
![Crochet Granny Ripple Blanket [Free Video Tutorial & Written Pattern!]](https://images.squarespace-cdn.com/content/v1/5e18a0efb9904526f1bedb80/1681828360468-GM5OT60HHNE0VKCO9HHI/blog_granny_ripple.jpg)
![Crochet Bobble Border [Free Video Tutorial & Written Pattern!]](https://images.squarespace-cdn.com/content/v1/5e18a0efb9904526f1bedb80/1679416802358-H4ROGXCZSYE05PA4PUYK/blog_bobble_border.jpg)

![Crochet Waffle Stitch [Free Video Tutorial & Written Pattern!]](https://images.squarespace-cdn.com/content/v1/5e18a0efb9904526f1bedb80/1664875481922-QNRO2CP9JZWOB98BC5C2/blog+waffle+stitch.jpg)
![Crochet Block Stitch [Free Video Tutorial & Written Pattern!]](https://images.squarespace-cdn.com/content/v1/5e18a0efb9904526f1bedb80/1684246610876-OSBRMN5B5AUGEJRUAWFK/blog_block_stitch_1.jpg)